The Friday Jot List

Happy Friday, friends! Let's dive right in to what's on my mind at the end of this week.


1. Gold or silver? Hello? Anyone out there? You guys are usually so opinionated when I ask for your two cents but I didn't get a lot of feedback on my gold versus silver lamp makeover dilemma that I shared earlier this week. I totally value your awesome opinions, so let me know what you think!

I guess I should probably explain my overall vision for the nightstand area to guide your thoughts. I originally planned to paint the nightstands a deep navy blue (I actually bought Benjamin Moore's Hidden Sapphire after seeing it on here on Danielle's blog) but now I think I'm more inspired by a grey stain. Maybe something like the Minwax Weathered Oak stain?


I feel like the stain will give me more diversity with the nightstands down the road more than the dark blue paint. But who knows. Maybe give me your thoughts on gold versus silver lamp bases with either the navy blue painted nightstands or the stained nightstands? Yes, that's perfect for the indecisive one in me : )

2. Around the web. I've posted a few fun articles on other blogs I write for around the Internet this week. I'd love it if you'd check them out!
 
 
on Houzz:

on ForRent:
 
on BabyCenter:
 
For any of you mommas to two or more youngins (or if you know any mommas to multiple youngins!), you'll love my BabyCenter article this week. Ooh and as a fun little bonus, there are a few never before seen photos of Little Lady June's nursery in the BabyCenter post! Be sure and check it out.

3. Tuesdays at Ten June. I'm already gearing up for next week's feature post. Send me your projects, photos, before/afters, kid-friendly posts, recipes and more and I'll feature you next Tuesday! As always, you can email me at tenjuneblog@gmail.com with the subject line "Tuesdays at Ten June" or you can tag your photos (don't forget to include your blog link, if you'd like!) on Instagram with #tuesdaysattenjune (and tag me @tenjuneblog too!). Can't wait to see what you're working with.

4. Baby watch 2014. For those of you who are wondering if Little Lady June has made an appearance yet, the answer is no! I can't even believe that it looks like I'll be seeing my due date on Sunday (March 2nd). I went into labor with HDawg at 38 weeks, 3 days, so this waiting game is definitely a change of pace for us!


If you follow me on Instagram, you saw that we did make another trip to the hospital yesterday. Unlike the first two visits during this pregnancy where my doctors thought I was in labor (and it ended up only being false labor, of course), our visit yesterday was due to a little accident. H was riding on one of his toys and fell backwards off of it. To avoid watching the back of his head smash into the hardwood floors, I dove (like an idiot) to catch him. Oops. Momma's instincts. I ended up turning and catching most of my weight on my elbow and knee but the handlebar of his toy bruised the top of my belly. After extensive testing, we learned all is perfectly healthy with Little Lady. Thank God! She's just a little too comfortable in momma's belly ;)

With that said, I'm off to eat something spicy, take a long walk, get a pedicure and do all of the other fun old wives tales that people have recommended to me, ha! Have a great weekend!

Put A Little Trim On It: A Lampshade Makeover

Little by little, I've been sharing with y'all corners of our new home that I've slowly decorated. Nothing fancy, nothing exceptionally mind-blowing. Just some updates I've taken on here and there. Today, I'm headed into another room of our house with a recent update.

Like any good MTV Cribs candidate, I'd be amiss if I didn't show you guys a peek at "where the magic happens." The bedroom, baby. Well, more specifically, the bed!

You've already seen what sits across from our master bed- my pretty little dresser and mirror vignette.


 On the other side of the room is our queen sized bed. It's currently looking fresh in its all white get up, but a little a lot boring if you ask me. One sad look at this side of the room shows off some unpainted Ikea nightstands (dude, get on that, Michelle... I bought those like six months ago!), some old school lamps that we've had for five or six years now and an unmade boring white duvet covered bed. Womp womp. And yes, I totally watermarked this "before" photo because I know you guys are going to go crazy with it on Pinterest. Pin away, friends. Sike.


Recently, I made a few *small* tweaks to the area and I think things are headed in the right direction.


The biggest change I've made so far is switching up the lampshades on the bedside lamps. I purchased two new white lamp shades from Target for $10 each. Then I added a strip of this trim from U-Fab. If you haven't heard of them, they're a crazy good online fabric store with lots of amazing decor fabric and trim. Check out their shop right here if you haven't before!


Seriously, isn't that trim the prettiest dang thing you've ever seen? I love it! The trim makes the new lampshades pop. Totally custom looking.

I'm thinking I'm going to use some Rub n' Buff to change the silver lamp bases to gold. What do you guys think? Do you like the lamps better in gold or silver?


I also added some big ol' white (yes, more white) Euro shams to the bed. And no, I still didn't make up the bed all the way for these "after" photos. I'm a terrible blogger. But I also have a belly as big as a gigantic watermelon... a gigantic watermelon that ate a basketball, really... so I'm excused.


 Anyways, the Euro shams are added and I plan to add a new throw to the bottom of the bed for some extra color and texture. I've also got big plans for some awesome pillow action with more U-Fab fabric. Here's a sneak peek!


 I think just those two little changes with the lampshades and Euro shams have made a big difference, don't you?

Oh and we've got a few temporary new changes in the bedroom, as well... a rocker and bassinet for Little Lady June! She'll be sleeping in here for a month or two when she finally arrives. We're lucky to have such a large master bedroom space for all of this baby gear!


Isn't it amazing what a little fabric trim does to dress up a plain lampshade?!


Don't forget to let me know your thoughts... gold Rub and Buff the lamp bases or not?!

If you're interested in seeing a few more peeks around our new rental house, check out these posts:

Tuesdays at Ten June

Let's spice up this Tuesday afternoon with a few fun reader features!

How cute is this bathroom makeover from Elizabeth at Little Black Door? I can't decide what I like best- the preppy apple green striped shower curtain, the classic white subway tile or the DIY copper towel rod?!


And just as a comparison, here's the before!


I'm also pretty sure I'm going to have to copy this idea soon... Meg from White Nest created a DIY basket pendant light fixture from an Ikea light kit and a Nate Berkus for Target basket. It looks adorable in her son's nursery, don't you think?


And, finally, I saw this Ikea Expedit hack over on Young House Love yesterday and had a total duh moment. Why hadn't I thought of wrapping a little wood frame around an Expedit to spruce it up? Genius! Their little boy's changing table is now officially supah cool.


Not to be Debbie Downer, but have you heard that Ikea has discontinued the Expedit altogether? GASP! From what I understand, they're replacing it with a similar piece of furniture. But, still, Ikea. Don't you know that decor bloggers like us love the Expedit with every ounce of our being? In the famous words of Amy Poehler and Seth Meyer... REALLY, Ikea? Seriously? Really? Oh well, hopefully the replacement model will be just as awesome sauce!

Share your Tuesday at Ten June project submissions with me via email (tenjuneblog@gmail.com) or over on Instagram (#tuesdaysattenjune).

DIY Baby Play Mat Sewing Tutorial

Hey friends! Hope you all had a great weekend. I won't bore you with all of the details, but we had quite the interesting weekend with another trip to the hospital with false labor. Who would have thunk that intense contractions five minutes apart or less at 39 weeks did not indicate labor?! Oy! Needless to say, little miss is still happily residing in my belly. But, thankfully, doctors are saying that she is incredibly healthy which is all we can really ask for!

Today I'm excited to share a little sewing project I created for Little Lady June. I'm not sure I have broken out the sewing machine since I finished up HDawg's DIY black out curtains! Which was, like, two years ago. Crazy. So it was kind of refreshing to pull out the ol' sewing machine.


There's a little back story behind this project. We had this Fisher-Price play mat for HDawg when he was an infant and absolutely loved it. Unfortunately, the play mat didn't make it through our two moves last year and was completely ruined. Luckily, the arms and electronic parts of the play gym still worked great. So, of course, instead of purchasing a new mat for LLJ, I decided to make her a new one!

I went back and forth as to what shape to make the mat. The original mat was a circle with loops around the circular edge to capture each "arm" of the gym. I could have created another circle mat, but was a little apprehensive about sewing a circle since this was my first project back at the sewing machine in a long time. Momma needs straight lines, people. So, I decided to go with a square and figure out a way to capture the gym arms another way!

Step one. Cut your fabric.
 

I purchased 1.5 yards of two different kinds of fabric and cut each into a square. I bought a heavy weight cotton/polyester blend red fabric for the bottom of the mat and a soft turquoise blue "minky" fabric for the top of the mat. After posting a photo on Instagram, I learned from many of you that minky fabric is notoriously difficult to work with. Oops! Didn't know that from the beginning, although I quickly found that to be the case.

I cut the minky fabric about one inch less on every side than the red fabric so that it would create a border of red around the mat once I sewed it together. Unfortunately, this didn't end up working as I describe below, but that was the game plan.


Step two. Pin your fabrics together.

I pinned the two fabrics together inside out, with the front faces of the fabric facing inward towards each other. The reasoning behind this approach is to sew the edges together, with the exception of about six inches on one side, inside out and then turn the piece inside out again... or right side up.


Step three. Sew the two pieces together.
 

I decided to use a hot pink contrast stitch and simply sewed a straight stitch down the edge of the two inside out pieces. The crazy minky fabric decided to sort of stretch itself out as I ran it through my machine, effectively closing the gap with the border I had created by cutting the blue fabric one inch shorter than the red. Basically, the two pieces ended up being sewed directly on top of each other if that makes sense. I probably should have basted the blue fabric on the red before I sewed it or at least had the knowledge that the fabric would stretch so bad so that I had a game plan to avoid the stretching. Oh well, you live and you learn!

Step four. Add batting.


Once I finished sewing the two pieces together inside out, I cut a piece of square cotton batting to match the fabric sizes. I loosely (like, only a few pins!) pinned the cotton batting onto the fabric and then turned the entire thing right side up. I then sewed around the edge of the entire piece, attaching both pieces of fabric and the batting together. I simply reached in the six inch gap I left to pull out the few batting pins as I sewed down the line. 

Once you stitch around the entire edge and close up the six inch gap, your basic play mat is complete!


Step five. Add the loops.


Now that the actual mat is finished, it's time to add the loops that will hold the play gym arms safely over your baby. My first thought was to create some sort of button-hole type fixture within the play mat to hold the feet, but then I decided that I'd like to be able to use this mat without the play gym. So instead of cutting through the fabric, I simply hand-stitched ribbon onto the mat to hold the legs. That way I can pull out the ribbons once we're done with the gym as LLJ grows.


Overall, I'm pretty happy with the project. You can see that the sides of the blanket sort of pucker up where the stretched out minky fabric pulls on the red cotton fabric, but I think that will work itself out with use.


I'm a big creep and wanted a model for my new play mat so instead of attempting to capture a rambunctious HDawg lying still under the mat, I used his baby doll. I'm weird, I know.


B-T-dubs, the majority of the photos I took looked like this. Hello, belly.


I'm pretty happy with the project! I spent about $20 on the fabric and batting, which is a lot better than the $60 to buy a new play gym. Plus, I've got a universal play mat that we can use with or without the gym for Little Lady June. I like it!


Leave me a comment if you have any questions about the process or sewing tutorial!

Check out more of sewing projects and info about what kind of sewing machine I use right here!

The Friday Jot List

Hi friends! It's been quite the week for me so far, so let's dive in to see what's on my mind this Friday.


1. Hello, drama queen. I feel like Little Lady June may be quite the drama queen! Between her crazy switch-a-roo from a boy to a girl to what has now become a somewhat dramatic labor, this little diva is definitely all girl so far! We spent last week braving some major contractions through an ice storm. Luckily, the ice melted and my contractions slowed and we made it through last week happily. This week, David and I spent all day Wednesday at the hospital, after my midwife decided at my regular appointment that I was in labor! They admitted me to the hospital but released me that afternoon to go home and rest. So I woke up Thursday morning and the contractions had all but disappeared. Insane! I went into labor with H at 38 weeks, 3 days and today I'm officially 38 weeks, 5 days today, so this waiting game is all new to me! Needless to say, we will be spending this weekend hanging out and waiting for this baby to get here!


2. Sewing. I broke out the ol' sewing machine earlier this week to pop out a quick project for little miss. I had no clue how tough "minky" fabric is to work with (it's the blue dotted fabric in the photo... I mean, really, that stuff is impossible!) until after I had finished the project and put this quick pic on Instagram. So many of you lamented how tough the fabric is to sew. Well, now I'm glad it's not just me! Can't wait to share this project with you on Monday.

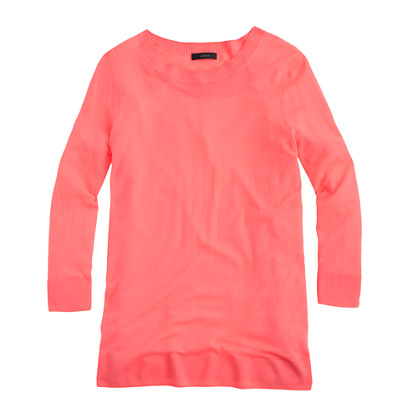
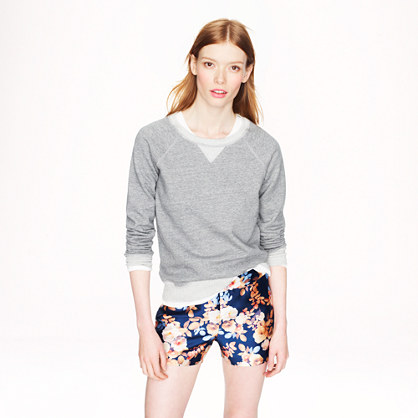
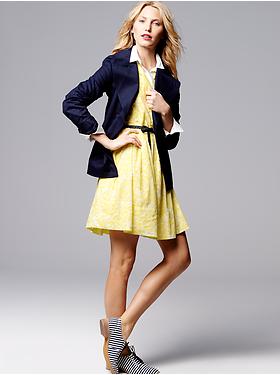
3. Spring. It feels so close! Yesterday, HDawg and I spent all day outdoors with my in-laws, trying to walk this baby out. He had so much fun exploring and enjoying the beautiful outdoors. I hope this weather is around to stay! Not only for the sunshine, but the spring fashion, too! Pretty soon, I can actually fit into something other than David's XXL work out tees and basketball shorts. Like maybe some of these....


I love spring fashion... it's so fun to mix cool and warm weather pieces.

4. Tuesdays at Ten June. Don't forget to submit your projects to me for next week! I've already got a few awesome things lined up- your project, recipe or room makeover could be included, too!

That's all I've got for today. Have a great weekend!

A Changing Table + Dresser for Little Lady June


Every little bambino's nursery has to have a changing table, right?! Apart from the crib, it's one of the most important parts of a baby's room. I don't even want to think about the millions of dirty diapers I've changed for HDawg on his changing table

Needless to say, it's a place I want to look awesome for Little Lady June's nursery since we'll be spending so much time on it. Originally, David and I sought to purchase a changing table with a little boy in mind. I found this solid wood espresso dresser from Wayfair and fell in love. It's smaller than the Ikea dresser we use for H's changing table, but this second little bean is in a much smaller room, so it works. This dresser is the same height as the Ikea Hemnes dresser though, just for the record. Clean lines, beautiful finish, a solid wood frame... it's exactly what we were looking for. And it would match the espresso crib we ordered for little guy! We clicked order and the dresser was on its way.

Then we found out baby boy is a baby girl and switched some of the furniture around. Even though she's got a white crib now, we decided to keep this espresso dark dresser for her. Let's keep it interesting with mismatched furniture, yeah? I think it looks great with the other pieces in the room.


 We "girlified" the piece by adding some pretty glass knobs. They're actually the same knobs we used to have on our custom bathroom vanity! I love their feminine, vintage flair.


Here's a peek of what's in the dresser, just because everyone loves little baby things.

First drawer, diapers and diaper changing accessories. Pretty much everything we have on HDawg's dresser top will be contained in this top drawer for easy access.


Second drawer, adorable baby clothes.
 

Third drawer, adorable baby accessories like burp cloths, bibs, socks, hats and HAIR BOWS!
 

Last drawer, blankets. For a tiny little dresser, it packs a lot of storage punch!
 

It was a breeze ordering from Wayfair but I will have to say we had a bit of a snafu when receiving the product. David got the whole box opened and started putting the dresser together, only to realize that one of the main side pieces was completely cracked. We called Wayfair and they simply ordered a new side panel for us. It took about 8-10 days for the new piece to get to us, but the replacement process was relatively easy. At least we didn't have to ship the entire dresser back!

I actually have one big project left for LLJ's room and it includes the space above this dresser. Here's a little sneak peek. Mhmmmm!


I kind of love this changing table area... is it weird that I'm excited to change some little newborn diapers here in the near future?! 

DISCLOSURE: Wayfair provided me with a gift certificate that aided in the purchase of this dresser, but all opinions and speculations about this piece of furniture or the shopping process with Wayfair are most certainly my own.

 In case you've missed it, check out our other posts about our sweet little girl's room makeover: 


Related Posts Plugin for WordPress, Blogger...